Manually install full Ruby firmware to internal eMMC storage on Radxa boards
Due to some technical limitations, some RunCam VRx-es might not support the SD card flashing method, in which case a full manual install on the internal eMMC storage must be performed.
This method can also be used for any VRx based on Radxa SOC, if you want to flash the Ruby firmware to the internal eMMC storage instead of running the Ruby firmware from the SD card.
Just follow the steps below to have the firmware installed on the internal eMMC storage:
Note: Unzip the downloaded image. You will need to use the actual image in uncompressed form.

After a while it should say “Download complete”. Then you can power everything down and then restart the VRx. Ruby will go through initialization which will take a little time. Then it’s done, your RunCam VRx should be ready to use.
This method can also be used for any VRx based on Radxa SOC, if you want to flash the Ruby firmware to the internal eMMC storage instead of running the Ruby firmware from the SD card.
Just follow the steps below to have the firmware installed on the internal eMMC storage:
1
Download the full Ruby firmware for your RunCam VRx or for your Radxa SOC based VRx: Ruby firmware download
Note: Unzip the downloaded image. You will need to use the actual image in uncompressed form.
2
Download the Radxa software used to flash eMMC storage from here: Radxa RKDevtool flashing software
3
Download the Radxa loader bin file from here: rk356x_spl_loader_ddr1056_v1.10.111.bin
4
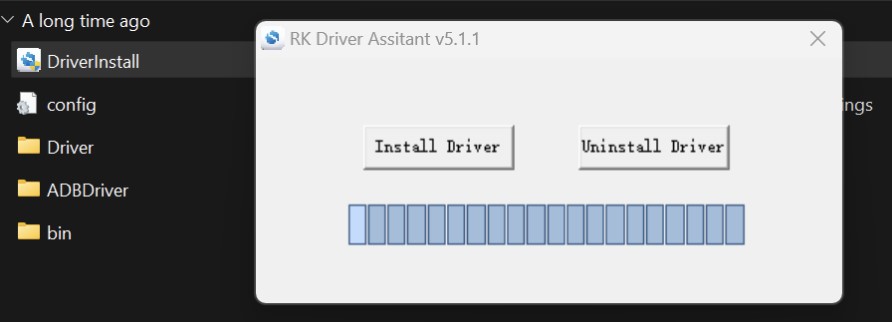
Open the downloaded Radxa tool folder and do install the Radxa driver first:
4. Install the Radxa driver
5
Change the language of the Radxa tool from Chinese to English: Open config file in RKDevtool_Release_v2.93 folder and change value Selected=1 to Selected=2. The app is now English:
5. Change tool language to English
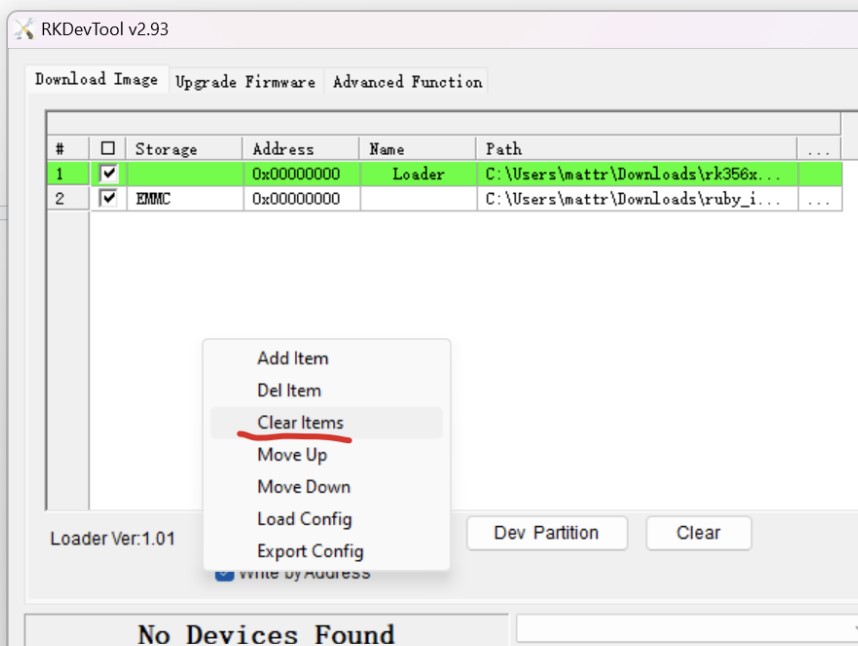
6
Launch the Radxa RKDevTool software. There might be some entries there already, that you will need to remove them first. Right click in the window and click “Clear items”.
6. Clear content
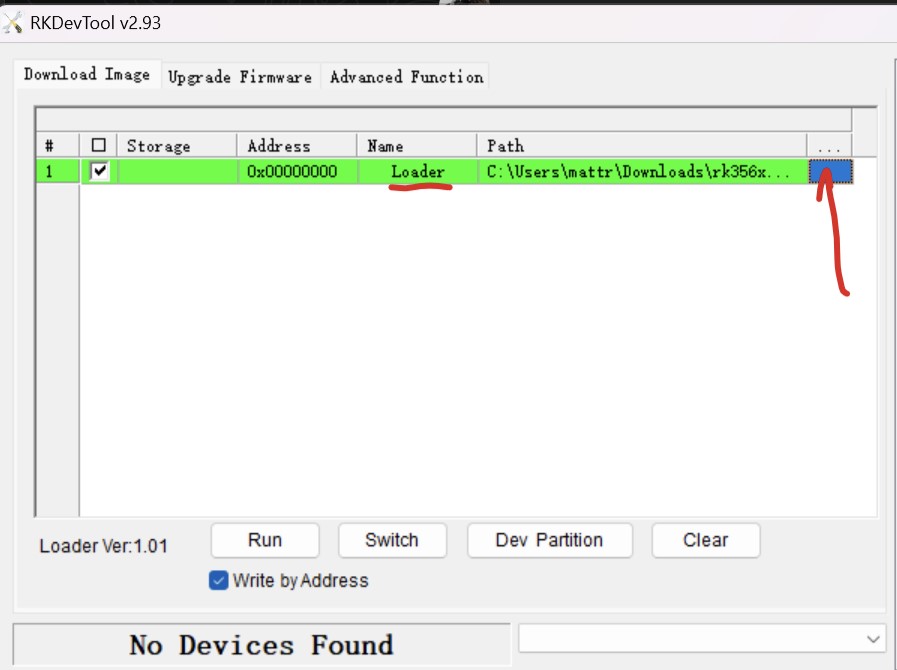
7
Now, on the first table entry (Loader) click on the column corresponding to the three dots.
7. Add file
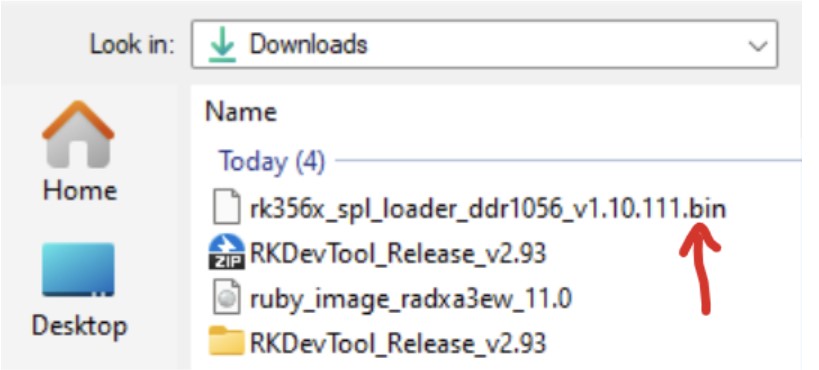
8
Select the file rk356x_spl_loader_ddr1056_v1.10.111.bin you downloaded above.
8. Select the rk356x_spl_loader_ddr1056_v1.10.111.bin file
9
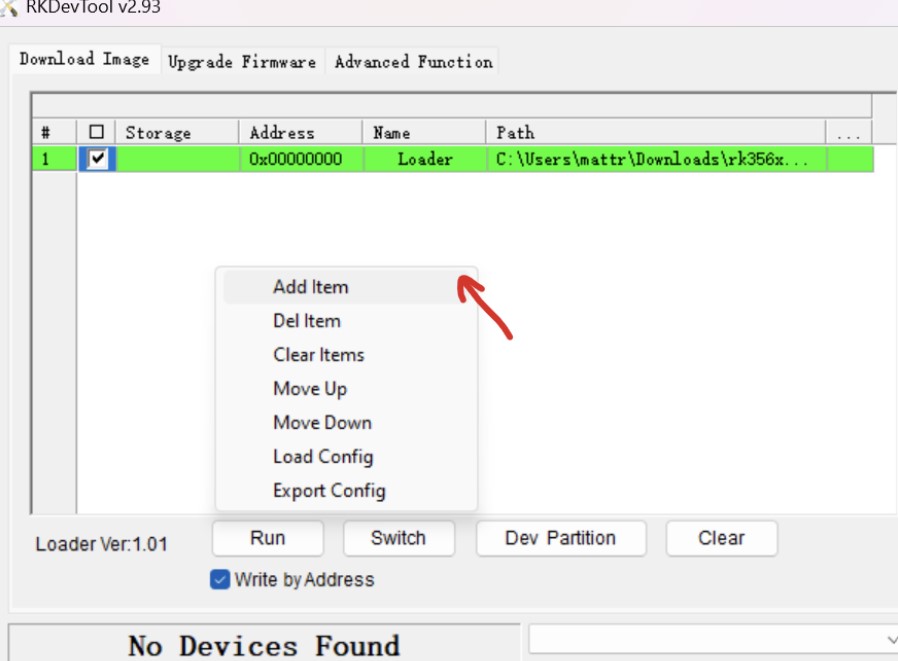
With one entry in the table now, add a new entry by right clicking on the table;
9. Add one more entry to the table
10
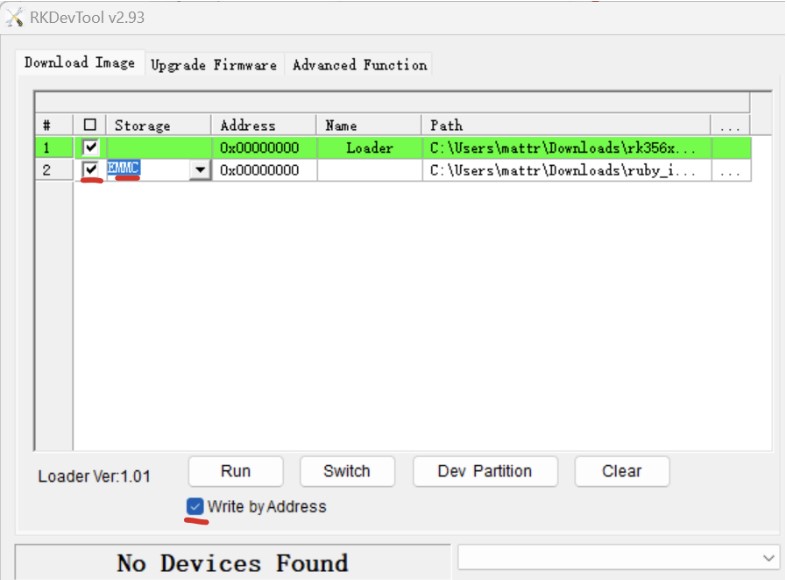
Use the Ruby full image you downloaded above (Note: Use the full uncompressed image, not in the compressed (zip) form. That is, extract the zip file first). Double click storage and select EMMC. Make sure both items are checked and that "Write by address" checkbox is also checked.
9. Check entries and checkboxes
11
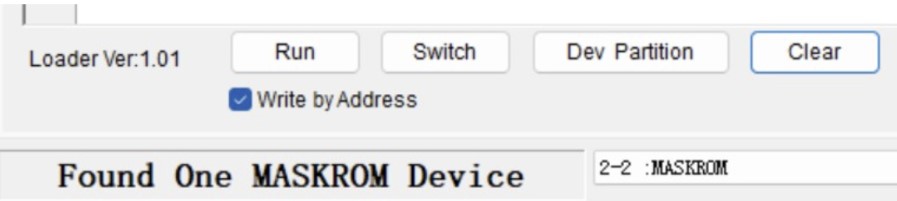
Put your VRx in bootloader mode: On the bottom there is a small button you can press with a pin next to the HDMI port. Hold it in, power up the VRX, wait 2 seconds and release. The VRx should be in bootloader mode and you can connect it to PC via the Type C port. It should say this:
10. Device found
12
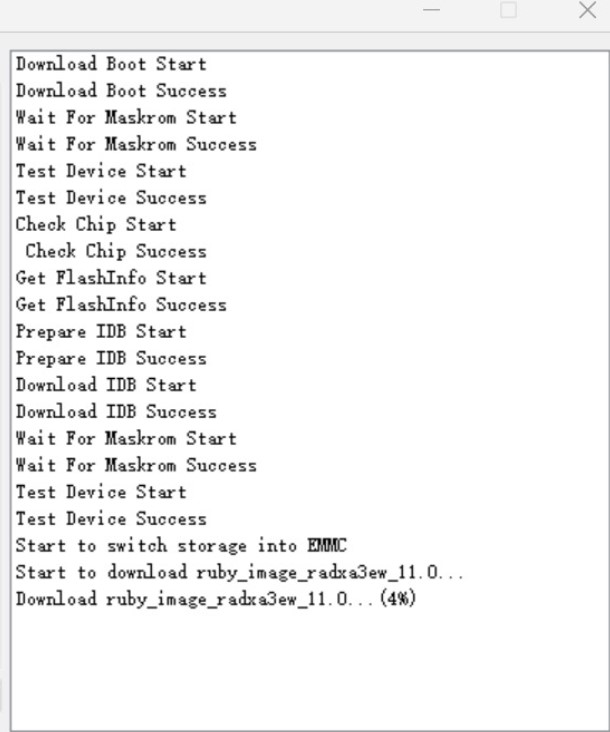
Press [Run] and wait. The actuall flashing to eMMC storage will be performed now.
10. eMMC storage is being flashed
After a while it should say “Download complete”. Then you can power everything down and then restart the VRx. Ruby will go through initialization which will take a little time. Then it’s done, your RunCam VRx should be ready to use.
(Thanks to Matt for help in writing of this guide)